Breaking in stiff leather boots without getting blisters requires controlling friction and moisture while gradually flexing the upper. Forcing a brand-new pair through a full day of walking almost guarantees heel sores because unyielding leather counters stay rigid while your heel moves inside the boot. The most reliable approach combines targeted skin protection, dense natural-fiber socks, and a two-week progressive wear schedule, supplemented by a light application of leather conditioner to flex points.
Where Boot Friction Starts
Blisters do not form from simple contact; they form from shear stress. When rigid leather refuses to flex in sync with your stride, your skin takes the force of that resistance. Recognizing where these forces concentrate helps you intervene before a hot spot becomes an open wound:
- The Heel Counter and Achilles Tendon: Vertical heel slip against a hard, unyielding counter creates intense friction along the back of the heel.
- The Ankle Crease: As you step forward, stiff leather on the boot shaft folds inward, pinching the skin across the front of the ankle.
- The Top of the Instep: Low seams or tight lacing create downward pressure over the top of the foot, restricting circulation and chafing skin over bone.
- The Pinky Toe and First Joint: Stiff side walls press against the foot’s widest points before the leather stretches or the footbed compresses.
Identifying these pressure points during an initial 10-minute trial at home allows you to apply protective barriers before taking a single step outside.
The Two-Week Progressive Wear Plan
Rushing leather break-in is the leading cause of deep heel blisters. Full-grain and thick vegetable-tanned leathers require repeated, low-stress flex cycles to soften and mould to your foot contour.
- Days 1 to 3 (30 to 60 Minutes Indoors): Wear your boots inside while working at a desk or doing light housework. Put on your thickest socks to gauge tightness and map out hot spots without committing to an extended walk.
- Days 4 to 7 (2 Hours Indoors): Extend wear time to two hours around the house. Actively flex the boot shaft by climbing stairs and taking exaggerated steps to work the leather at the ankle fold.
- Days 8 to 10 (30-Minute Outdoor Walks): Take short errands near your home. Always apply friction tape or hydrocolloid bandages to known hot spots before leaving the house.
- Days 11 to 14 (Half-Day Light Activity): Wear the boots for 3 to 4 hours of routine daily movement. Carry spare adhesive bandages in case unexpected friction develops.
- Day 15 Onward (Full-Day Wear): Transition to all-day use once the leather yields smoothly at the ankle and the footbed begins taking the impression of your foot.
Barrier Strategies: Socks, Tape, and Pads
Preventing blisters relies on redirecting friction so movement occurs between outer layers rather than against your skin.
High-Density Socks
Avoid thin cotton socks, which absorb sweat, hold moisture against the skin, and collapse under friction. Choose dense merino wool or wool-blend socks instead. Merino fibers pull dampness away from the foot, maintaining a cushioned barrier that fills subtle voids between your foot and the boot lining. If a boot feels exceptionally stiff, wear a thin synthetic liner sock beneath a medium wool sock; friction will occur between the two sock layers rather than on your heel.
Direct Skin Protection
At the first sign of warmth or redness on your heel, apply a physical barrier directly to clean, dry skin. Hydrocolloid bandages offer thick gel cushioning that absorbs direct pressure and shear forces. If using moleskin or specialized friction tape, cut pieces with rounded corners. Sharp corners peel up easily when sliding your foot into a tight boot throat, creating a folded wad that creates more pressure than it prevents.
Heel Grips and Volume Adjustment
If your heel lifts more than a quarter of an inch when walking, the boot throat or heel counter is too loose for your foot volume. Adding a smooth leather or suede adhesive heel grip to the inside back of the boot counter reduces vertical travel. For low-instep feet, adding a thin leather footbed insert elevates the foot, pressing the heel back into the pocket.
Softening Leather Without Damaging the Structure
Thick leather uppers break in faster when the hide's internal fibers are lubricated. Treating high-stress flex zones accelerates pliability without destroying the boot's long-term structure.
- Clean the Surface: Brush off factory dust or packing debris with a soft microfiber cloth.
- Apply Conditioner to Flex Zones: Massage a small amount of dedicated leather conditioner, cream, or balsam into the ankle fold, tongue seams, and lower vamp. Focus on areas where the boot bends during a step, avoiding the structured heel counter and toe cap, which need to stay firm.
- Rest and Buff: Let the leather absorb the conditioner at room temperature for 12 to 24 hours. Wipe off any excess product with a clean cloth before wearing.
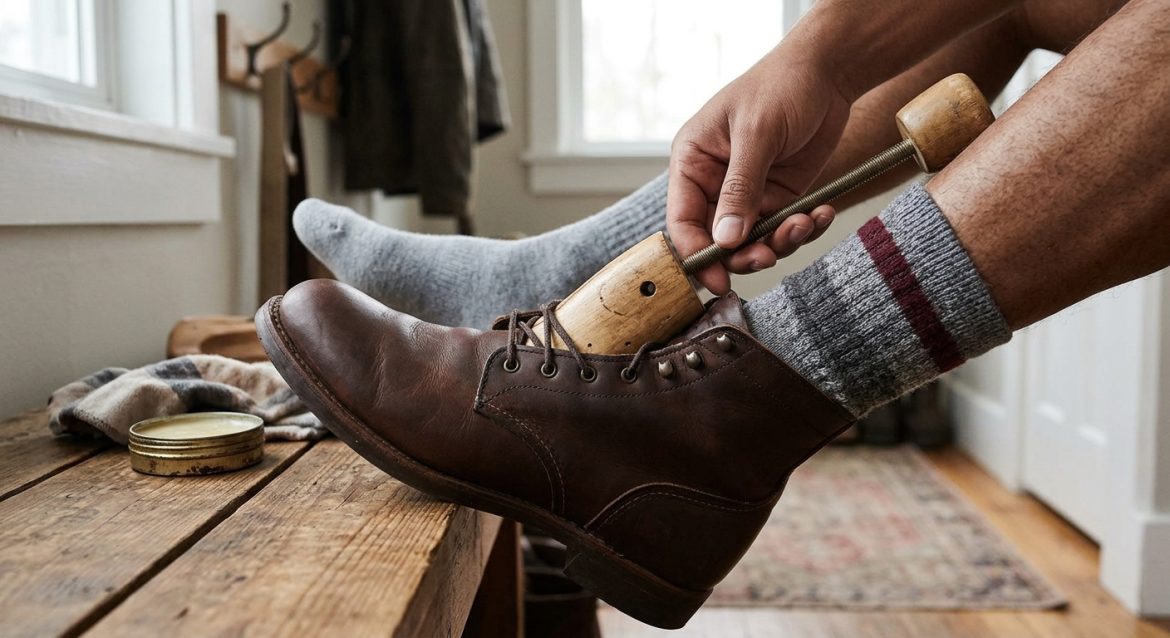
- Targeted Mechanical Stretching: If the ball of your foot feels uncomfortably squeezed, use a wooden boot stretcher equipped with spot-stretching plugs. Leave the stretcher engaged for 24 hours to gain targeted relief across a single joint without over-stretching the rest of the boot.
High-Risk DIY Hacks to Avoid
Shortcut methods circulating online often permanently ruin fine leather, weaken stitching, or destroy internal structure:
- Soaking Boots in Water: Submerging leather strips away factory oils. As the leather dries, it contracts unevenly, leaving the hide stiff, brittle, and prone to surface cracking.
- Blow Dryers and Heat Guns: Direct high heat bakes leather fibers, evaporating natural moisture and breaking down adhesives along welt seams and midsoles.
- Rubbing Alcohol Sprays: Alcohol breaks down factory protective finishes and rapidly dries out leather fibers, leading to premature cracking across flex points.
- Freezing Water Bags in the Toe Box: Water expands as it turns to ice, but the force is uncontrolled. It can tear welt stitching, stretch eyelets, or permanently warp toe boxes out of shape.
Normal Stiffness vs. An Incorrect Fit
No amount of conditioning or sock layering can make a boot comfortable if the size or last is wrong. Distinguishing normal initial stiffness from a sizing error saves you from unnecessary pain.
Expected Break-In Indicators
- Firm, snug pressure across the instep and sides of the foot without sharp pain.
- A small amount of heel lift (1/8 to 1/4 inch) that gradually decreases as the outsole loosens and bends.
- Initial stiffness along the upper shaft that softens after several short wearing sessions.
Sizing Red Flags
- Toes touching or jamming against the front of the toe box when walking downhill.
- Persistent tingling, burning, or loss of sensation across the top of the foot or toes.
- Heel lift exceeding half an inch, causing your foot to slip out of the heel cup despite thick socks.
- The ball of your foot sitting noticeably ahead of or behind the widest flex point of the boot's outsole.
If you encounter toe jamming or foot numbness, swap the boots for a larger size or a wider width rather than attempting to force a break-in.
Pre-Walk Preparation Checklist
Before taking new leather boots on an extended outing, complete these quick checks:
- Inspect heels, ankle bones, and insteps for any red marks after your last indoor wear session.
- Apply rounded pieces of blister tape or hydrocolloid patches over vulnerable areas before putting on socks.
- Put on medium-to-heavy merino wool socks (or a liner-plus-wool combination) to fill excess boot volume.
- Ensure the lower laces across the instep are snug enough to hold the heel back, but not so tight that they compress top nerves.
- Carry a small packet of adhesive bandages and friction tape in your pocket or bag for instant on-the-go adjustments.