To stop your heel from slipping out of a loafer, you must identify whether the gap is above your foot, behind your heel, or caused by a rigid sole. Stick-on heel grips often fail because they treat every slip as a rear width problem. If your foot slides forward into the toe box, adding padding to the heel just squeezes your toes while your heel continues to lift.
Here is how to pinpoint the cause in two minutes, select the right insert, and fix stiff leather soles without damaging your shoes.
Step 1: Diagnose Why Your Loafer Is Slipping
Put on the loafers with the socks you plan to wear, stand up, and run three quick checks before buying any inserts or pads.
- Test top clearance (Instep Volume): Slide a finger under the strap, penny slot, or top leather (vamp) of the shoe. If there is open space above your midfoot and your foot slides forward when walking, low instep volume is the problem. Your foot is moving forward, leaving empty space behind your heel.
- Test sole rigidity: Walk across a hard floor. If your midfoot wants to flex at the ball of your foot but the leather sole remains flat and rigid, the shoe acts as a lever. As you step, the stiff sole pulls the back of the shoe straight down away from your heel bone.
- Test heel cup clearance: Keep your foot flat and check the sides of your heel bone. If the loafer fits snugly across your instep, but you see gap space on the sides of your heel, the shoe's heel counter is shaped wider than your foot.
If your issue is low instep volume, padding the back of the heel will force your toes into the front of the shoe. You must adjust the top fit first.
Choose the Right Insert for Your Fit Problem
Different fit issues require distinct solutions. Placing the wrong pad inside a loafer changes the shoe's internal proportions, leading to friction and blisters.
Felt or Leather Tongue Pads (For Low Insteps)
A tongue pad is a small, adhesive oval made of felt or thin leather that attaches to the underside of the shoe’s upper leather (the vamp area).
- When to use it: Your heel slips because your foot slides forward into the front of the shoe, leaving empty space at the back.
- How it works: Filling the open vertical space above your midfoot presses your foot backward into the heel counter. This locks your heel against the back wall without shortening the toe box or rubbing against skin.
- Material choice: Wool felt or natural leather tongue pads conform to your foot over time. Thin synthetic foam compresses permanently after a few wears, losing its cushion.
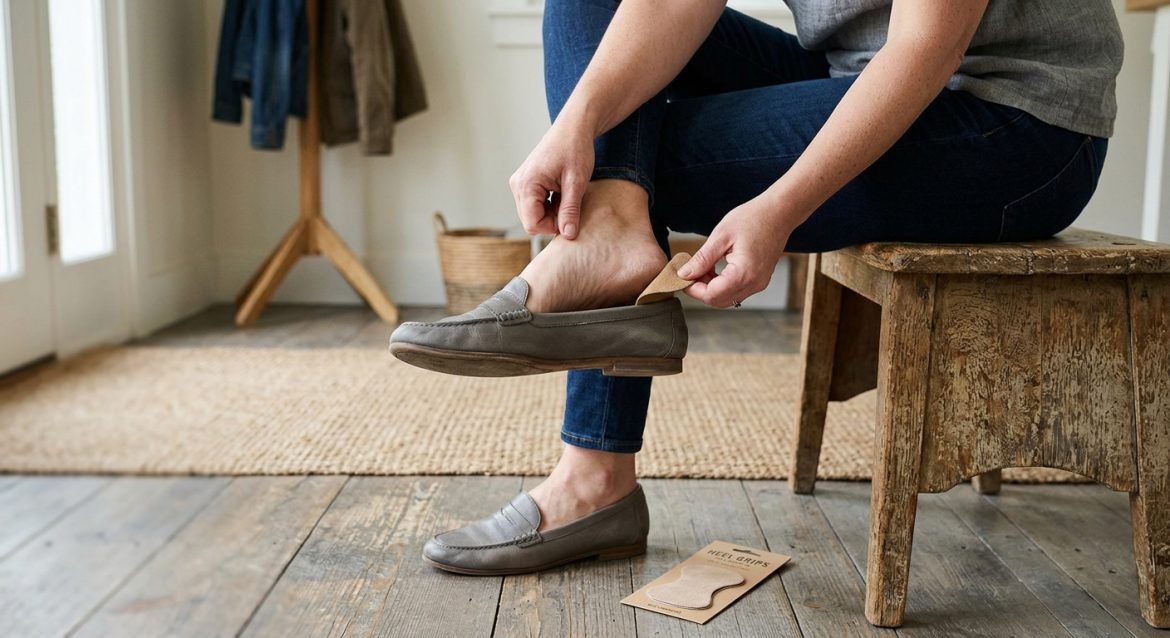
Suede Heel Grips (For Wide Heel Cups)
Heel grips adhere directly to the inside back wall of the shoe counter.
- When to use it: The shoe fits well across your midfoot and toes, but your heel bone is narrow, leaving room on the sides of the heel opening.
- How it works: Grips reduce the inner circumference of the heel cup and add surface friction to resist vertical movement.
- Material choice: Select genuine suede or soft microfiber grips over clear gel or silicone strips. Smooth silicone strips catch against socks and drag them down into the shoe. Gel adhesives also tend to break down when exposed to body heat, leaving a gummy residue on shoe linings. Suede creates traction while allowing your heel to slide in smoothly when putting the shoe on.
3/4 Leather Insoles (For Shoes That Are Half a Size Too Large)
Full-length insoles often crowd the toe box, pinching your toes while leaving the back unstable. A 3/4-length insole ends just behind the ball of the foot.
- When to use it: The loafer feels slightly roomier overall, with slight slippage at the heel and excess space through the arch.
- How it works: It elevates the heel and arch, taking up vertical space in the rear two-thirds of the shoe while leaving the front clear so your toes sit flat.
Soften a Rigid Sole to Remove Leverage
New leather loafers—particularly those constructed with a welted rim or thick leather outsoles—do not flex easily out of the box. When you walk, your foot bends at the metatarsals, but a stiff sole stays flat, pulling the rear of the shoe away from your heel.
You can reduce this pulling force by flexing the shoe manually before wearing it outside:
- Hold the toe of the loafer in one hand and the heel in the other.
- Flex the toe upward toward the collar, bending the shoe right at the ball of the foot where your toes flex naturally.
- Repeat this gentle bending motion 15 to 20 times per shoe. Do not force a deep diagonal crease into delicate leather, but work the midsole enough to ease its initial stiffness.
- Put the shoe on and walk on a rug. The back of the shoe should track more closely with your foot as the outsole flexes with your stride.
Adjust Sock Fabric and Friction Dynamics
Sock materials change how your heel interacts with the shoe's inner leather. Sheer nylon liners and smooth dress socks remove friction, causing even properly fitted heels to slide out.
- Wear no-show socks with silicone heel strips: Choose no-show socks built with multiple silicone grip strips inside the back heel. The silicone grips your skin while the outer fabric holds the interior shoe lining.
- Avoid slick synthetic fabrics: Thin 100% polyester or nylon socks create a slick barrier against leather. Choose combed cotton, merino wool, or socks with a matte, textured knit.
- Barefoot wearing: If you prefer going sockless, apply a thin piece of protective moleskin directly to your heel skin where friction occurs—not inside the shoe. Applying sticky adhesives to fine leather linings can tear or discolor the lining when removed.
Fixes That Damage Leather Shoes
Several common quick fixes can ruin leather footwear or cause foot pain over time.
- Soaking shoes in water to shrink them: Water strips natural oils from leather hides. As the leather dries, it becomes brittle, stiff, and prone to cracking.
- Using a hairdryer for heat shrinking: Applying direct hot air breaks down internal shoe glues and warps the structural heel counter.
- Stuffing cotton or foam into the toe box: Cramming material into the front forces your toes into a bent position. This causes calluses and bruised toenails without solving low instep volume or wide heel counters.
When to Consult a Professional Cobbler
If inserts and sole flexing do not solve the slippage, a cobbler can modify the shoe's structure safely:
- Installing a stitched suede heel liner: A cobbler can sew a thin suede pad over the interior heel wall, narrowing the opening permanently without peeling adhesive stickers.
- Adding hidden elastic gores: For loafers that have stretched out around the ankle collar, a cobbler can insert matching elastic beneath the vamp strap to pull the shoe closer to the top of your foot.
- Combining stretching with rear padding: If you bought a larger size to fit a wide forefoot and now have loose heels, a cobbler can stretch the front leather horizontally while adding custom rear padding to lock your heel.
Simple Fix Worksheet
Use this simple decision flow to resolve heel slip efficiently:
- Flex the sole by hand: Spend two minutes working the sole back and forth at the ball of the foot to relieve lever action.
- Check vertical gap: If top clearance exists over your instep, stick a felt tongue pad under the shoe vamp.
- Check heel side clearance: If the midfoot fits but the heel cup gaps at the sides, place a suede grip along the back wall.
- Switch sock fabric: Wear textured cotton or wool socks with internal silicone heel strips.
- Check overall length: Push your heel firmly into the back counter. If you have more than a thumb's width of space ahead of your longest toe, the shoe is simply too long and requires a smaller size or professional cobbler modification.