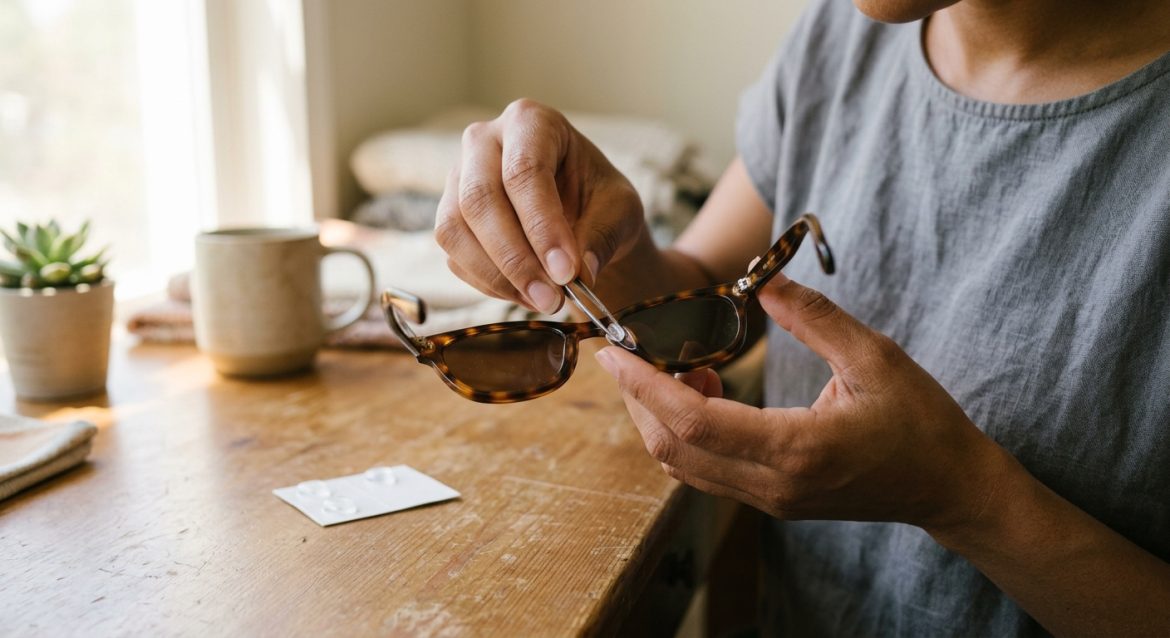
Sunglasses slip down your nose bridge for two main reasons: improper physical fit—such as a bridge that is too wide or temple arms with insufficient tension behind the ears—or a loss of friction caused by facial oils, moisturizer, and liquid foundation. Metal frames with flexible wire pad arms require physical tightening, whereas plastic acetate frames often require adjusting the curve behind your ears or altering your skincare application under the bridge.
Diagnostic Checklist: Is It Frame Fit or Makeup Breakdown?
Before adjusting your frames or buying non-slip accessories, determine whether your glasses are sliding because of frame geometry or cosmetic breakdown.
- Bare Skin Test: Clean your nose bridge with water, dry it thoroughly, and put on your glasses without applying skincare or makeup. Tilt your head down and shake it gently. If the sunglasses slip immediately, the issue is frame fit—the bridge is too wide, the pad arms are spaced too far apart, or the temple arms lack curvature behind your ears.
- The Midday Slip: If your frames stay secure for the first hour of wear but begin sliding down around noon, the cause is sebum accumulation and cosmetic breakdown. Skincare products and facial oils break down under heat and create a slick layer beneath the frame contact points.
- Asymmetric Drift: If the right side drops while the left side stays put, your temple arms are uneven, placing unbalanced pressure across your nose.
- Pinching with Slippage: If your frames leave deep, painful red marks on the sides of your nose bridge yet still slide forward when you look down, the bridge is too narrow or the nose pads sit at an incorrect angle, forcing the frame upward until gravity pushes it down the slope.
Skin Prep and Makeup Tweaks for the Nose Bridge
When liquid foundation, sunscreens, and face oils mix under plastic bridges or metal nose pads, surface friction drops significantly. Modifying your application order around your nose bridge stops cosmetic transfer and keeps frames anchored.
1. Clear Oils from the Contact Zone
Sunscreen and facial moisturizer are essential, but heavy creams under nose pads guarantee slipping. Apply your skincare routine as usual, then take a clean cotton swab or tissue and gently wipe away excess product along the exact strip where your frames sit.
2. Replace Foundation with Matte Eye Primer
Liquid foundations contain emulsifiers and oils that break down under heat and physical friction. Instead of layering liquid foundation over your nose bridge:
- Dab a tiny dot of oil-free, matte eyeshadow primer over the contact spots on your nose bridge. Eye primers are formulated specifically to resist skin oils and handle continuous friction.
- Tap a light dusting of translucent setting powder directly over the primer before applying any color products.
- If you need coverage over the bridge, press a thin layer of powder foundation onto the skin rather than a liquid or cream formula.
3. Anchor the Bridge with a Sponge-Applied Setting Spray
Spraying setting spray across your entire face creates a fine, uneven mist that may not offer enough density at high-friction points. For stronger hold, spray a matte setting spray onto the tip of a damp makeup sponge and press it firmly into the bridge of your nose. Allow it to dry completely before putting on your frames.
Friction Accessories: Silicone Pads, Wax, and Ear Grips
If skin prep is not enough to hold your frames in place, non-permanent friction accessories can secure the bridge without permanently modifying your glasses.
| Accessory | Best For | Key Advantages | Trade-offs |
|---|---|---|---|
| Stick-on Silicone Nose Pads | Acetate (plastic) frames with fixed bridges, especially on lower nose bridges. | Adds immediate grip; narrows bridge width by 1mm to 2mm. | Raises frame height on the face; pad edges may show on clear or translucent plastic. |
| Anti-Slip Frame Wax | Clear acetate frames or readers who want an invisible solution without stick-on pads. | Invisible; does not alter frame dimensions or leave permanent residue. | Requires reapplication every few hours; traps cosmetic residue and needs nightly cleaning. |
| Silicone Ear Grips (Hooks) | Heavy, front-heavy shield frames or active outdoor use. | Anchors frames from behind the ear, pulling the front tight against the face. | Visible from the side or rear with short hair or updos; can pull on long hair during removal. |
Adjusting Metal vs. Acetate Frames at Home
Physical frame adjustments permanently alter tension across your ears and nose bridge. Metal and acetate react to pressure differently; improper handling can snap frame arms or fracture plastic bridges.
Metal Frames with Adjustable Nose Pad Arms
Metal wire frames rely on small nose pads mounted on thin, bendable metal arms.
- To tighten a wide bridge: Hold the front frame wire firmly with one hand. Squeeze the pad arms closer together in tiny fractions of a millimeter using your thumb and index finger.
- To adjust height: Push pad arms further apart if frames sit too high on your face; pinch them closer if frames sit too low or rest on your cheeks.
- Check the angle: Ensure the face of each silicone pad rests completely flat against your skin. If pads press on their sharp outer edges, they will cause pain and red marks without improving grip.
Plastic (Acetate) Frames
Acetate frames lack movable nose pad arms, so slippage is corrected by adjusting the curve behind your ears to pull the frame back against your face.
- Warm the plastic: Hold the curved ear tips under hot tap water (not boiling) for 30 to 45 seconds until the material becomes slightly pliable. Keep hot water away from the lenses to prevent damage to anti-reflective or protective coatings.
- Increase the downward bend: Hold the temple arm near the hinge and use your thumb to bend the softened tip downward and slightly inward.
- Cool to lock the shape: Hold the arm in its new curve while running it under cold tap water for 15 seconds to set the bend.
- Check the fit: Put the frames on. The curve should cup the dip behind your ear cartilage without pressing hard into the bone.
Matching the Solution to Your Frame Style
Match your correction method to your frame construction:
- Wire Aviators and Metal Frames: Adjust pad arms inward. Avoid stick-on silicone pads over existing movable pads, which creates excessive bulk and uneven leverage.
- Thick Acetate Wayfarers: Warm temple tips to increase downward ear hook curve. Apply clear stick-on silicone pads to fixed bridges if your nose bridge is narrow.
- Translucent or Clear Frames: Use anti-slip wax or adjust temple tip curvature behind the ears. Adhesive backings on stick-on pads show through clear plastic.
- Heavy, Front-Heavy Shield Sunglasses: Combine matte eye primer on the nose bridge with silicone ear grips behind the ears to counter heavy front lenses.
When to Consult an Optician
While minor adjustments and skin prep fixes are safe to try at home, certain materials and hardware issues require professional optical tools:
- Optyl or Titanium Frames: Titanium requires specialized optical pliers to bend without snapping, while Optyl memory plastic requires precise dry-heat frame warmers to reshape safely.
- Loose or Stripped Hinge Screws: If temple arms flop open freely, the frames lose lateral tension across your head. Tighten loose screws with a jeweler’s screwdriver, or let an optician replace stripped hardware.
- Persistent Temple Headaches: If eliminating slippage leaves you with pain behind your ears or headaches across your temples, the frame front is too narrow for your head. An optician can safely widen the temple angle without ruining frame alignment.
Step-by-Step Action Plan
- Step 1: Test on clean skin. Blot face oil off your nose bridge, apply matte eye primer and powder, and test the frames on oil-free skin to rule out cosmetic slip.
- Step 2: Add non-permanent grip. If bare-skin frames still slide, apply stick-on silicone pads to fixed plastic bridges or pinch pad arms inward on metal frames.
- Step 3: Adjust ear tension. If frames slide forward when you tilt your head down, warm plastic temple tips under hot tap water and increase the downward curve behind your ears.